> For the complete documentation index, see [llms.txt](https://docs.bossithq.com/llms.txt). Markdown versions of documentation pages are available by appending `.md` to page URLs; this page is available as [Markdown](https://docs.bossithq.com/printers/label-printers/star-label-printers/star-lan-label-printer-configuration.md).
# Star LAN Label Printer Configuration
{% hint style="success" %}
Star mC-Label3 can act as a label printer. It is fully supported on Android but not on our Web POS.
{% endhint %}
{% stepper %}
{% step %}
### Connect the Printer to the Network
Ensure that the printer is connected to the internet.
{% endstep %}
{% step %}
### Print the Network Status Sheet
1. Turn on the printer while holding the **Feed button** until you hear the printer beep and see the paper start to feed out, then let go.
2. The printer will print out two receipts.
3. Look at the second receipt and find the **Current IP Parameters Status** section—your printer's IP address will be listed there
{% endstep %}
{% step %}
### Add Printer in POS Settings
1. Open your POS settings.
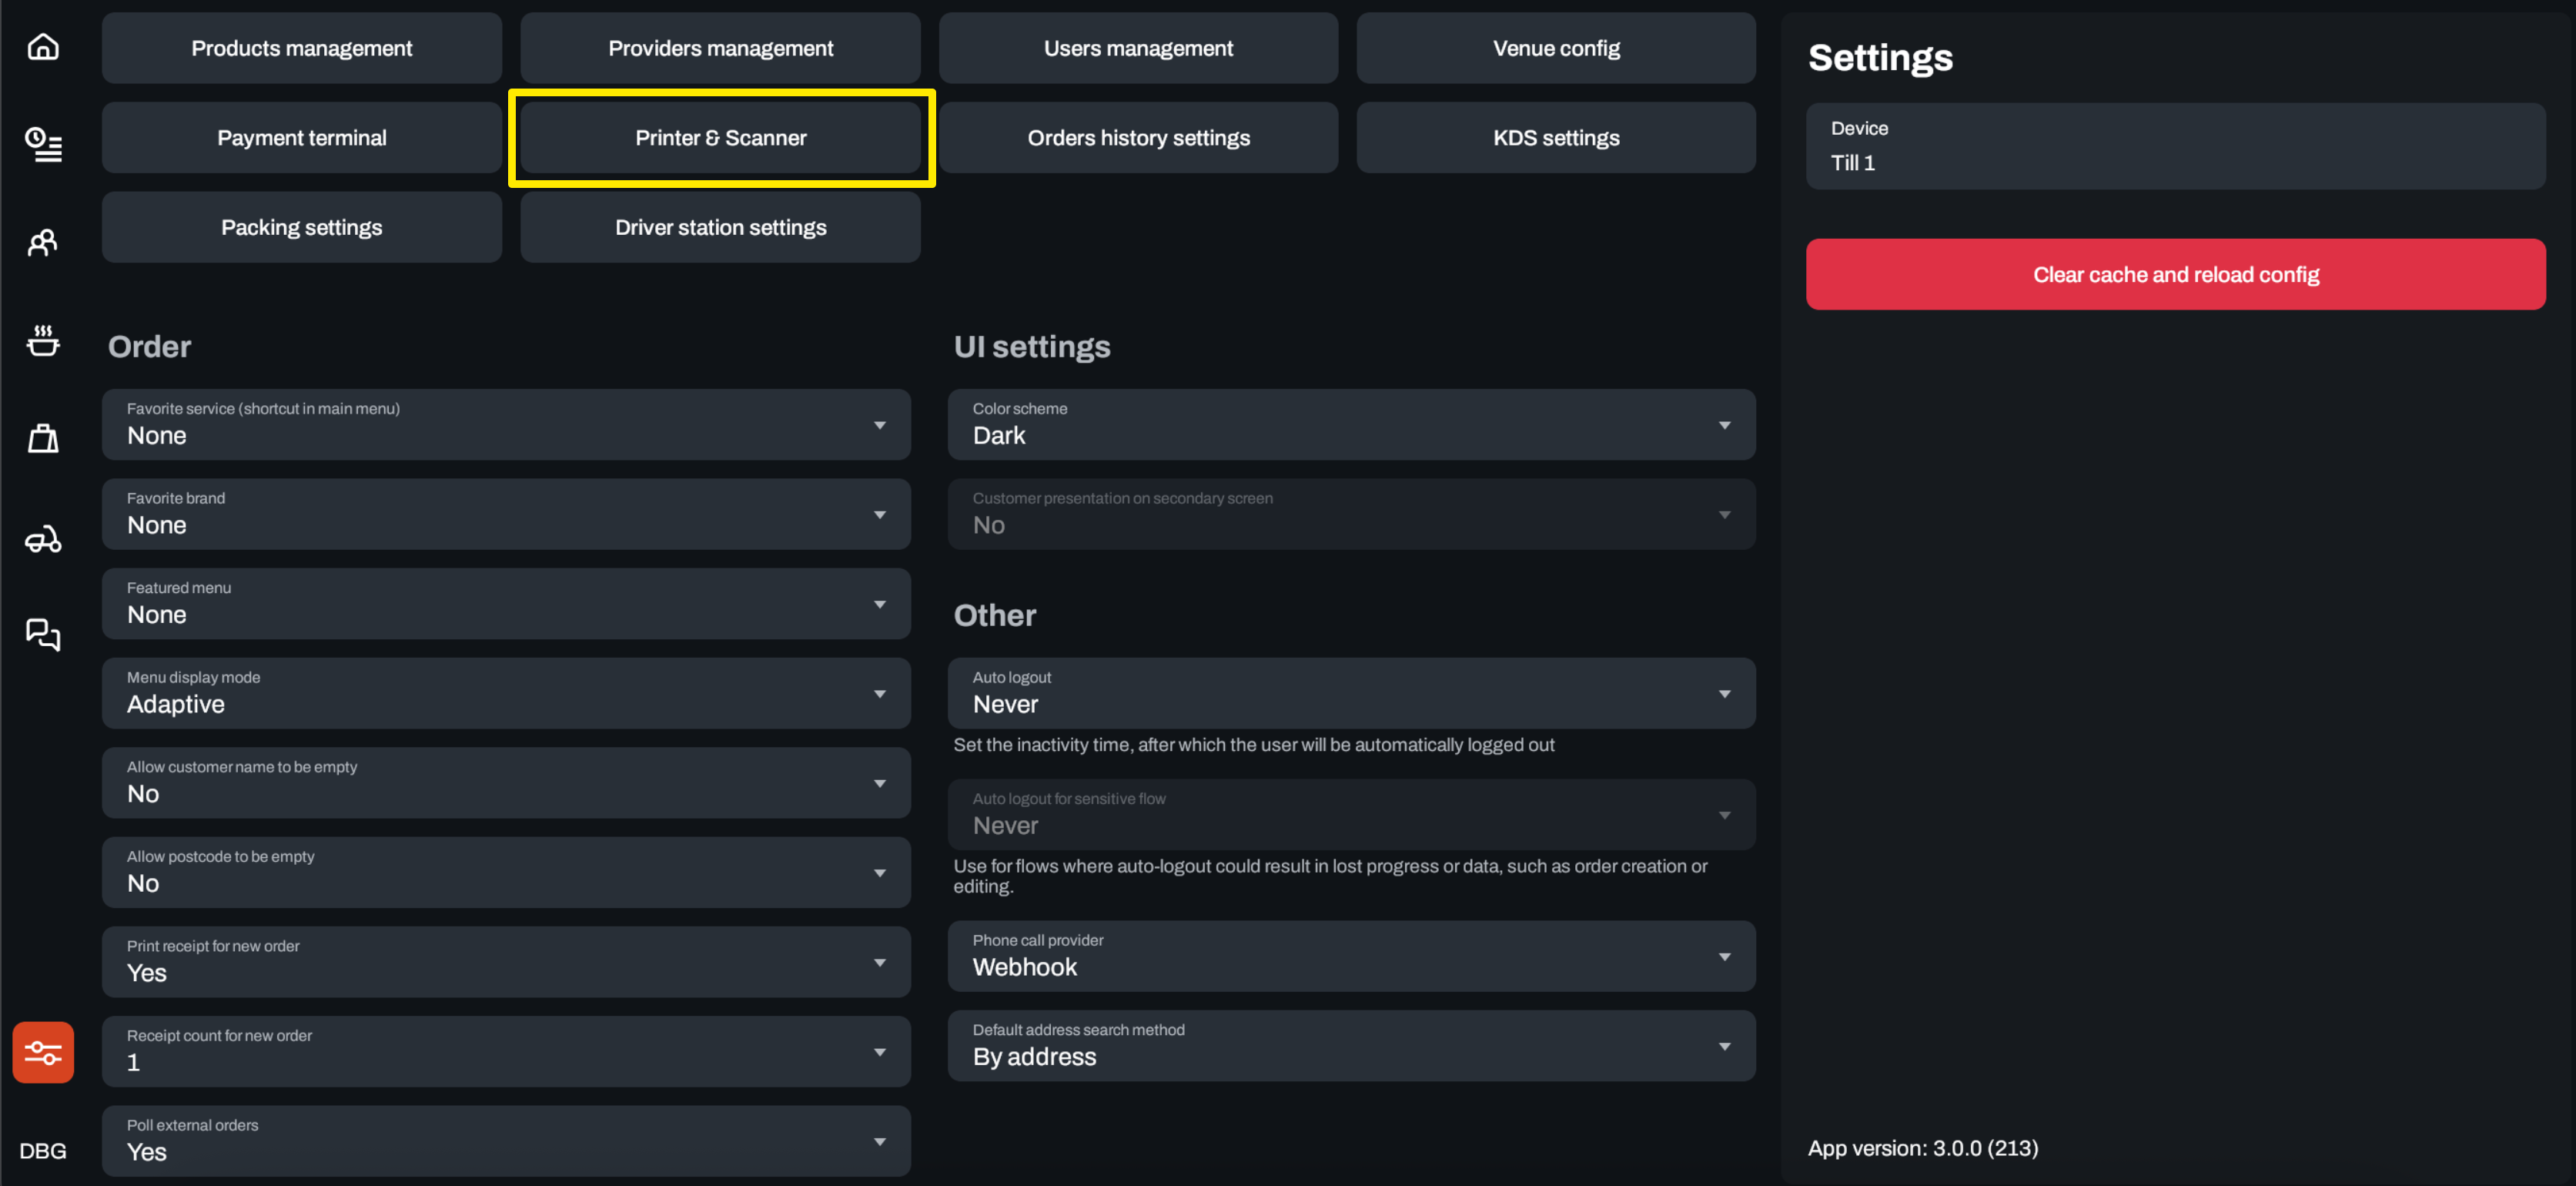
2. Go to **Printer and Scanner**.
3. In **Label Printer**, select **STAR LAN**.
4. In the IP field, enter the IP address from the receipt.
{% hint style="info" %}
Printing from web POS is only supported in some models:
* mC-Print3
* MCP31LB
* MCP31L
* MCP31CB
* MCP31C
* MCP30
* mC-Print2
* MCP21LB
* MCP20B
* MCP20
For web, allow network access on first print.


{% endhint %}
{% endstep %}
{% step %}
### Test Printing
Print a test receipt to make sure everything works correctly.
{% endstep %}
{% endstepper %}
---
# Agent Instructions
This documentation is published with GitBook. GitBook is the documentation platform designed so that both humans and AI agents can read, navigate, and reason over technical content effectively. Learn more at gitbook.com.
## Querying This Documentation
If you need additional information that is not directly available in this page, you can query the documentation by asking a question.
Perform an HTTP GET request on the following URL with the `ask` and `goal` query parameters:
```
GET https://docs.bossithq.com/printers/label-printers/star-label-printers/star-lan-label-printer-configuration.md?ask=&goal=
```
`ask` is the immediate question: it should be specific, self-contained, and written in natural language.
`goal` is what the user is ultimately trying to achieve, the reason they need the answer. Sharing it helps GitBook give you a better, more relevant answer. A goal is most helpful when it describes the outcome the user wants rather than restating the question. For example, with `ask=how do I create an API token`, a goal like `automate deployments from our CI pipeline` lets GitBook tailor the answer to that use case.
The response will contain a direct answer to the question and relevant excerpts and sources from the documentation.
Use this mechanism when the answer is not explicitly present in the current page, you need clarification or additional context, or you want to retrieve related documentation sections.